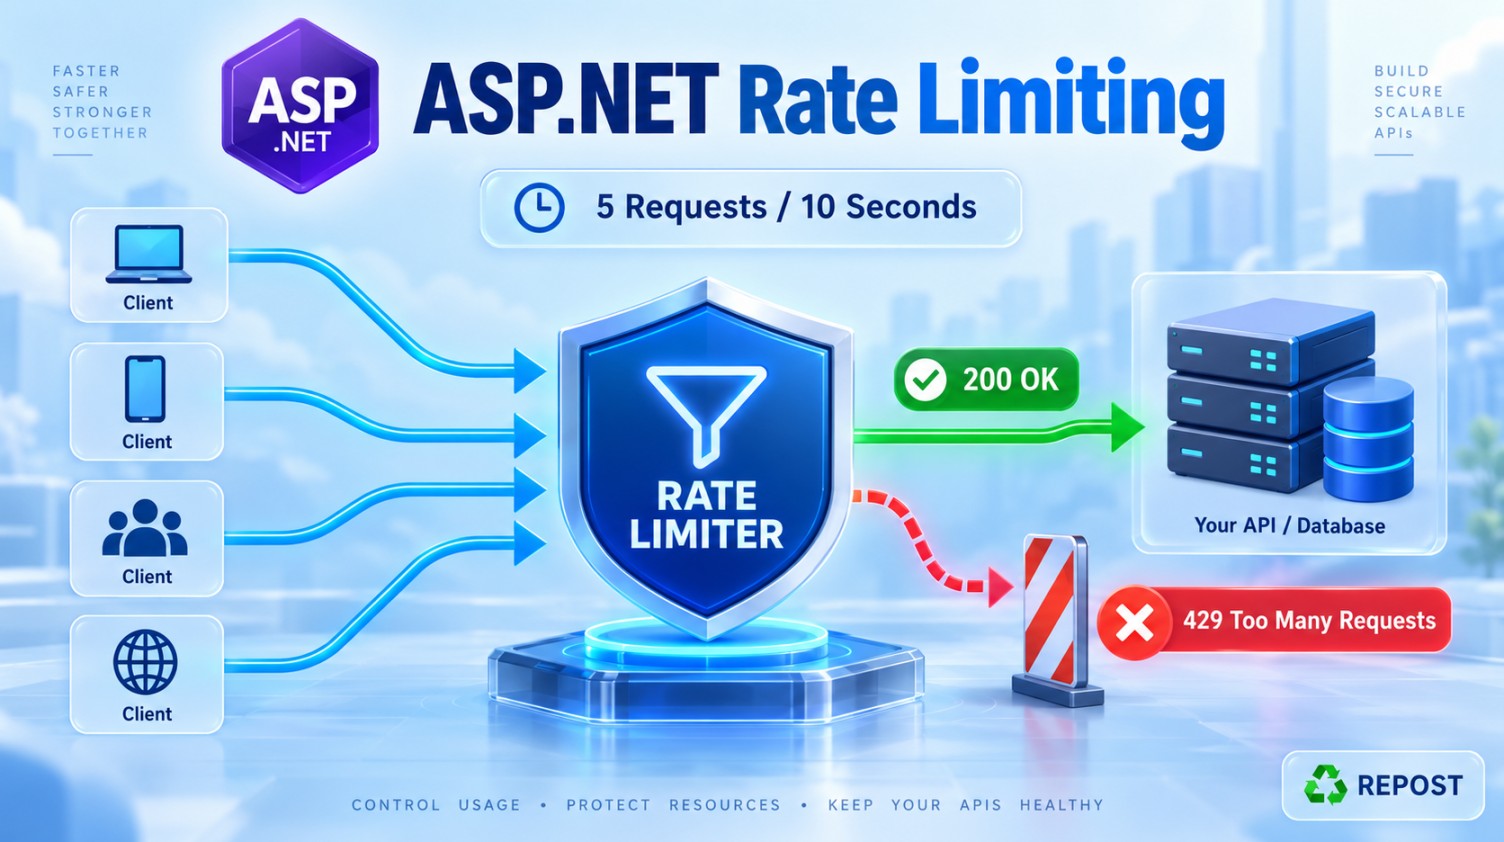


Types of Rate Limiting in ASP.NET Core Web API
Rate limiting controls how many requests an API accepts from a client within a given period or how many requests it processes simultaneously.
It helps to:
-
Prevent API abuse.
-
Protect the server from overload.
-
Ensure fair usage among clients.
-
Control CPU, memory and database usage.
-
Reduce automated attacks.
-
Manage API usage based on subscription plans.
ASP.NET Core provides built-in rate-limiting middleware with four main algorithms:
-
Fixed Window
-
Sliding Window
-
Token Bucket
-
Concurrency
These are available through the Microsoft.AspNetCore.RateLimiting namespace. Microsoft documentation
Required namespaces
using Microsoft.AspNetCore.RateLimiting;
using System.Threading.RateLimiting;
Usually, no additional NuGet package is required in modern ASP.NET Core Web API projects because the middleware is included in the ASP.NET Core shared framework.
1. Fixed Window Rate Limiting
What is Fixed Window?
Fixed Window divides time into fixed intervals and allows a specified number of requests during each interval.
For example:
Permit limit: 5 requests
Window:       10 seconds
The client can send a maximum of five requests during every fixed 10-second window.
Window 1: 00–10 seconds → 5 requests allowed
Window 2: 10–20 seconds → limit resets to 5
Window 3: 20–30 seconds → limit resets to 5
Program.cs configuration
using Microsoft.AspNetCore.RateLimiting;
using System.Threading.RateLimiting;

var builder = WebApplication.CreateBuilder(args);

builder.Services.AddControllers();

builder.Services.AddRateLimiter(options =>
{
    options.AddFixedWindowLimiter("FixedPolicy", policy =>
    {
        policy.PermitLimit = 5;
        policy.Window = TimeSpan.FromSeconds(10);

        policy.QueueProcessingOrder =
            QueueProcessingOrder.OldestFirst;

        policy.QueueLimit = 2;
    });
});

var app = builder.Build();

app.UseHttpsRedirection();

app.UseRateLimiter();

app.MapControllers();

app.Run();
Apply it to a controller
using Microsoft.AspNetCore.Mvc;
using Microsoft.AspNetCore.RateLimiting;

[ApiController]
[Route("api/[controller]")]
[EnableRateLimiting("FixedPolicy")]
public class ProductsController : ControllerBase
{
    [HttpGet]
    public IActionResult GetProducts()
    {
        return Ok(new[]
        {
            "Laptop",
            "Mobile",
            "Keyboard"
        });
    }
}
How it works
With the preceding configuration:
-
First 5 requests are accepted.
-
Next 2 requests can wait in the queue.
-
Further requests are rejected.
-
The request limit resets after 10 seconds.
Main disadvantage: boundary burst
Suppose the client sends:
-
5 requests at the end of the first window.
-
5 more requests at the beginning of the next window.
The server may receive 10 requests within a very short period.
Window 1                    Window 2
----------|-----------------|----------
        5 requests       5 requests
This boundary burst is the main weakness of Fixed Window.
Best use cases
Use Fixed Window when:
-
The rules are simple.
-
Small traffic bursts are acceptable.
-
You need limits such as “100 requests per minute.”
-
Exact smoothness is not important.
2. Sliding Window Rate Limiting
What is Sliding Window?
Sliding Window is similar to Fixed Window, but it divides each window into smaller segments.
As time moves forward, the oldest segment expires and its request capacity becomes available again.
For example:
Window:              60 seconds
Segments per window: 6
Permit limit:        100
Each segment represents:
60 ÷ 6 = 10 secondsThe limiter examines activity over the most recent 60 seconds, with capacity being recycled as each 10-second segment expires.
Program.cs configuration
builder.Services.AddRateLimiter(options =>
{
    options.AddSlidingWindowLimiter("SlidingPolicy", policy =>
    {
        policy.PermitLimit = 10;

        policy.Window = TimeSpan.FromSeconds(30);

        policy.SegmentsPerWindow = 3;

        policy.QueueProcessingOrder =
            QueueProcessingOrder.OldestFirst;

        policy.QueueLimit = 2;
    });
});
Apply it to an endpoint
[EnableRateLimiting("SlidingPolicy")]
[HttpGet("reports")]
public IActionResult GetReports()
{
    return Ok("Reports returned successfully.");
}
How it works
The configuration contains:
Window:              30 seconds
Segments:            3
Each segment:        10 seconds
Maximum requests:    10
Every 10 seconds, the oldest segment falls outside the active window. The requests recorded in that expired segment no longer count against the active limit.
This produces smoother traffic control than Fixed Window.
Advantages
-
Reduces the boundary-burst problem.
-
Produces smoother request distribution.
-
More accurate than Fixed Window.
-
Good for public APIs with continuous traffic.
Disadvantages
-
Slightly more complex.
-
Requires more tracking than Fixed Window.
-
Choosing too many segments can add overhead.
Best use cases
Use Sliding Window when:
-
Traffic must be controlled more smoothly.
-
Fixed-window boundary bursts are undesirable.
-
You have public APIs with continuous client traffic.
-
You need better fairness between users.
3. Token Bucket Rate Limiting
What is Token Bucket?
Token Bucket uses a virtual bucket containing tokens.
Each incoming request must consume a token:
1 request = 1 tokenTokens are added to the bucket periodically. If no tokens are available, the request is queued or rejected.
Simple scenario
Suppose:
Token limit:               10
Tokens added each period:   2
Replenishment period:      10 seconds
Initially, the bucket has 10 tokens.
Request arrives → consumes 1 token
Another request → consumes 1 token
10 requests     → all tokens used
After 10 seconds, two new tokens are added.
Therefore, another two requests can be processed.
Program.cs configuration
builder.Services.AddRateLimiter(options =>
{
    options.AddTokenBucketLimiter("TokenPolicy", policy =>
    {
        policy.TokenLimit = 10;

        policy.TokensPerPeriod = 2;

        policy.ReplenishmentPeriod =
            TimeSpan.FromSeconds(10);

        policy.AutoReplenishment = true;

        policy.QueueProcessingOrder =
            QueueProcessingOrder.OldestFirst;

        policy.QueueLimit = 2;
    });
});
Apply it to an endpoint
[EnableRateLimiting("TokenPolicy")]
[HttpPost("orders")]
public IActionResult CreateOrder()
{
    return Ok("Order created successfully.");
}
Important properties
TokenLimit
Maximum number of tokens the bucket can hold.
policy.TokenLimit = 10;The bucket cannot contain more than 10 tokens.
TokensPerPeriod
Number of tokens added during each replenishment period.
policy.TokensPerPeriod = 2;ReplenishmentPeriod
How frequently tokens are added.
policy.ReplenishmentPeriod =
    TimeSpan.FromSeconds(10);
AutoReplenishment
Automatically adds tokens at the configured interval.
policy.AutoReplenishment = true;Advantages
-
Supports short bursts of traffic.
-
Controls the long-term average request rate.
-
Unused tokens can accumulate up to
TokenLimit. -
More flexible than window-based algorithms.
Disadvantages
-
Configuration requires careful planning.
-
Large bucket sizes can allow heavy bursts.
-
Small replenishment rates can unnecessarily slow clients.
Best use cases
Use Token Bucket when:
-
Short bursts should be allowed.
-
Long-term traffic must remain controlled.
-
An API has subscription plans.
-
Clients occasionally send batches of requests.
Example:
Free plan       → 10-token bucket
Standard plan   → 100-token bucket
Premium plan    → 1,000-token bucket
4. Concurrency Rate Limiting
What is Concurrency Limiting?
Concurrency Limiting controls how many requests can be processed at the same time.
It does not limit the number of requests per minute or second.
For example:
Permit limit: 3 concurrent requests
Queue limit:  2 requests
At any moment:
-
3 requests can be processed.
-
2 additional requests can wait.
-
Any further request is rejected.
When a running request completes, one queued request is allowed to start.
Program.cs configuration
builder.Services.AddRateLimiter(options =>
{
    options.AddConcurrencyLimiter("ConcurrencyPolicy", policy =>
    {
        policy.PermitLimit = 3;

        policy.QueueProcessingOrder =
            QueueProcessingOrder.OldestFirst;

        policy.QueueLimit = 2;
    });
});
Notice that Concurrency Limiter does not have a time window.
Apply it to an endpoint
[EnableRateLimiting("ConcurrencyPolicy")]
[HttpGet("generate-report")]
public async Task<IActionResult> GenerateReport()
{
    await Task.Delay(5000);

    return Ok("Report generated successfully.");
}
If three report-generation requests are already running:
-
The next two wait in the queue.
-
Requests beyond the queue capacity are rejected.
Advantages
-
Protects CPU-intensive operations.
-
Protects database connections.
-
Controls expensive report-generation processes.
-
Prevents too many long-running operations.
-
Useful when duration matters more than request count.
Important difference
Suppose each request completes in 10 milliseconds.
A Concurrency Limiter could process thousands of requests per minute while still allowing only three at the same moment.
Therefore:
Concurrency limiting controls simultaneous requests, not requests per time period.
Best use cases
Use Concurrency Limiter for:
-
Report generation.
-
File uploads.
-
Image or video processing.
-
Expensive database queries.
-
External API calls.
-
Long-running operations.
-
Limited server resources.
Comparison of the four algorithms
| Type | Controls | Supports bursts? | Has time window? | Best use |
|---|---|---|---|---|
| Fixed Window | Requests per fixed period | Yes | Yes | Simple limits |
| Sliding Window | Requests over a moving period | Limited | Yes | Smooth and fair traffic |
| Token Bucket | Requests based on available tokens | Yes | Replenishment period | Controlled average with bursts |
| Concurrency | Requests running simultaneously | Not time-based | No | Expensive operations |
Complete example with all four policies
Program.cs
using Microsoft.AspNetCore.RateLimiting;
using System.Threading.RateLimiting;

var builder = WebApplication.CreateBuilder(args);

builder.Services.AddControllers();

builder.Services.AddRateLimiter(options =>
{
    // Default rejection status
    options.RejectionStatusCode =
        StatusCodes.Status429TooManyRequests;

    // 1. Fixed Window
    options.AddFixedWindowLimiter("FixedPolicy", policy =>
    {
        policy.PermitLimit = 5;
        policy.Window = TimeSpan.FromSeconds(10);
        policy.QueueLimit = 0;
        policy.QueueProcessingOrder =
            QueueProcessingOrder.OldestFirst;
    });

    // 2. Sliding Window
    options.AddSlidingWindowLimiter("SlidingPolicy", policy =>
    {
        policy.PermitLimit = 10;
        policy.Window = TimeSpan.FromSeconds(30);
        policy.SegmentsPerWindow = 3;
        policy.QueueLimit = 2;
        policy.QueueProcessingOrder =
            QueueProcessingOrder.OldestFirst;
    });

    // 3. Token Bucket
    options.AddTokenBucketLimiter("TokenPolicy", policy =>
    {
        policy.TokenLimit = 10;
        policy.TokensPerPeriod = 2;
        policy.ReplenishmentPeriod =
            TimeSpan.FromSeconds(10);
        policy.AutoReplenishment = true;
        policy.QueueLimit = 2;
        policy.QueueProcessingOrder =
            QueueProcessingOrder.OldestFirst;
    });

    // 4. Concurrency
    options.AddConcurrencyLimiter(
        "ConcurrencyPolicy", policy =>
    {
        policy.PermitLimit = 3;
        policy.QueueLimit = 2;
        policy.QueueProcessingOrder =
            QueueProcessingOrder.OldestFirst;
    });

    options.OnRejected = async (context, token) =>
    {
        context.HttpContext.Response.StatusCode =
            StatusCodes.Status429TooManyRequests;

        await context.HttpContext.Response.WriteAsJsonAsync(
            new
            {
                statusCode = 429,
                message =
                    "Too many requests. Please try again later."
            },
            cancellationToken: token);
    };
});

var app = builder.Build();

app.UseHttpsRedirection();

app.UseRateLimiter();

app.MapControllers();

app.Run();
Applying different policies to different endpoints
using Microsoft.AspNetCore.Mvc;
using Microsoft.AspNetCore.RateLimiting;

[ApiController]
[Route("api/[controller]")]
public class DemoController : ControllerBase
{
    [EnableRateLimiting("FixedPolicy")]
    [HttpGet("products")]
    public IActionResult GetProducts()
    {
        return Ok("Fixed Window applied.");
    }

    [EnableRateLimiting("SlidingPolicy")]
    [HttpGet("search")]
    public IActionResult Search()
    {
        return Ok("Sliding Window applied.");
    }

    [EnableRateLimiting("TokenPolicy")]
    [HttpPost("orders")]
    public IActionResult CreateOrder()
    {
        return Ok("Token Bucket applied.");
    }

    [EnableRateLimiting("ConcurrencyPolicy")]
    [HttpGet("reports")]
    public async Task<IActionResult> GenerateReport()
    {
        await Task.Delay(3000);

        return Ok("Concurrency Limiter applied.");
    }
}
Important configuration properties
PermitLimit
Maximum permits available.
For window algorithms, this generally means requests per window:
policy.PermitLimit = 10;For Concurrency Limiter, it means the maximum number of simultaneous requests.
QueueLimit
Maximum number of requests allowed to wait.
policy.QueueLimit = 2;Use zero to disable queuing:
policy.QueueLimit = 0;Large queues are generally dangerous because they can:
-
Increase response time.
-
Consume memory.
-
Cause request timeouts.
-
Hide an overloaded server.
QueueProcessingOrder
Determines which queued request is processed first.
Oldest first
policy.QueueProcessingOrder =
    QueueProcessingOrder.OldestFirst;
Works like FIFO:
Oldest request → processed firstThis normally provides better fairness.
Newest first
policy.QueueProcessingOrder =
    QueueProcessingOrder.NewestFirst;
Newer requests receive priority. When the queue is full, older queued requests may be dropped to make room for newer requests.
Use this only when fresh requests are more valuable than stale ones.
Returning 429 Too Many Requests
When a request exceeds the limit, the API normally returns:
HTTP/1.1 429 Too Many RequestsConfigure it explicitly:
options.RejectionStatusCode =
    StatusCodes.Status429TooManyRequests;
Custom response:
options.OnRejected = async (context, token) =>
{
    context.HttpContext.Response.StatusCode =
        StatusCodes.Status429TooManyRequests;

    await context.HttpContext.Response.WriteAsJsonAsync(
        new
        {
            statusCode = 429,
            message = "Rate limit exceeded.",
            suggestion = "Please try again later."
        },
        cancellationToken: token);
};
Adding the Retry-After header
Some limiters can provide information indicating how long the client should wait.
options.OnRejected = async (context, token) =>
{
    if (context.Lease.TryGetMetadata(
        MetadataName.RetryAfter,
        out TimeSpan retryAfter))
    {
        context.HttpContext.Response.Headers.RetryAfter =
            ((int)retryAfter.TotalSeconds).ToString();
    }

    context.HttpContext.Response.StatusCode =
        StatusCodes.Status429TooManyRequests;

    await context.HttpContext.Response.WriteAsJsonAsync(
        new
        {
            statusCode = 429,
            message = "Rate limit exceeded.",
            retryAfterSeconds =
                context.Lease.TryGetMetadata(
                    MetadataName.RetryAfter,
                    out TimeSpan delay)
                    ? (int?)delay.TotalSeconds
                    : null
        },
        cancellationToken: token);
};
Possible response:
HTTP/1.1 429 Too Many Requests
Retry-After: 8
Content-Type: application/json
{
"statusCode": 429,
"message": "Rate limit exceeded.",
"retryAfterSeconds": 8
}The client should wait before retrying.
Global rate limiting
A global limiter applies automatically to all endpoints.
builder.Services.AddRateLimiter(options =>
{
    options.GlobalLimiter =
        PartitionedRateLimiter.Create<HttpContext, string>(
            httpContext =>
                RateLimitPartition.GetFixedWindowLimiter(
                    partitionKey: "Global",
                    factory: _ =>
                        new FixedWindowRateLimiterOptions
                        {
                            PermitLimit = 100,
                            Window =
                                TimeSpan.FromMinutes(1),
                            QueueLimit = 0,
                            AutoReplenishment = true
                        }));
});
This shares one limit across every request and every client, which is rarely ideal for a public production API.
Usually, partitioning by user, API key, tenant or IP address is better.
Partitioned rate limiting
What is partitioning?
Partitioning creates a separate rate limit for each client or category.
Without partitioning:
All clients share one limitWith partitioning:
User A → separate limit
User B → separate limit
User C → separate limit
Limit by authenticated username
builder.Services.AddRateLimiter(options =>
{
    options.GlobalLimiter =
        PartitionedRateLimiter.Create<HttpContext, string>(
            httpContext =>
            {
                string userName =
                    httpContext.User.Identity?.Name
                    ?? "Anonymous";

                return RateLimitPartition
                    .GetFixedWindowLimiter(
                        partitionKey: userName,
                        factory: _ =>
                            new FixedWindowRateLimiterOptions
                            {
                                PermitLimit = 10,
                                Window =
                                    TimeSpan.FromMinutes(1),
                                QueueLimit = 0,
                                AutoReplenishment = true
                            });
            });
});
Each user receives ten requests per minute.
Limit by IP address
builder.Services.AddRateLimiter(options =>
{
    options.GlobalLimiter =
        PartitionedRateLimiter.Create<HttpContext, string>(
            httpContext =>
            {
                string ipAddress =
                    httpContext.Connection
                               .RemoteIpAddress?
                               .ToString()
                    ?? "Unknown";

                return RateLimitPartition
                    .GetFixedWindowLimiter(
                        partitionKey: ipAddress,
                        factory: _ =>
                            new FixedWindowRateLimiterOptions
                            {
                                PermitLimit = 20,
                                Window =
                                    TimeSpan.FromMinutes(1),
                                QueueLimit = 0,
                                AutoReplenishment = true
                            });
            });
});
Every IP address receives its own limit.
Be careful when the application is behind a proxy or load balancer. Correct forwarded-header configuration is necessary before relying on RemoteIpAddress.
Common partition keys
You can partition by:
-
Authenticated user ID.
-
JWT claim.
-
Tenant ID.
-
API key.
-
Subscription level.
-
IP address.
-
Request host.
-
Endpoint category.
Chained rate limiting
Multiple limiters can be combined so a request must satisfy every limiter.
Example requirement:
Per-client rule:  10 requests per minute
Global rule:      Maximum 50 concurrent requests
This protects the API against:
-
A single abusive client.
-
Total application overload.
Conceptually:
Request
   ↓
Per-user rate limit
   ↓
Global concurrency limit
   ↓
API endpoint
Chaining is useful in production because one algorithm rarely addresses every risk.
Named policy vs global policy
Named policy
A named policy is applied only to selected endpoints:
options.AddFixedWindowLimiter("FixedPolicy", ...);Apply with:
[EnableRateLimiting("FixedPolicy")]or:
app.MapControllers()
   .RequireRateLimiting("FixedPolicy");
Global policy
A global policy automatically applies to all endpoints:
options.GlobalLimiter = ...;If an endpoint has both a global limiter and an endpoint-specific limiter, both can affect the request.
Disable rate limiting for an endpoint
[DisableRateLimiting]
[HttpGet("health")]
public IActionResult Health()
{
    return Ok("Healthy");
}
This can be useful for carefully chosen endpoints such as internal health checks. However, disabling endpoint-level limiting does not necessarily bypass a configured global limiter.
Which limiter should you choose?
Use Fixed Window when
-
Requirements are simple.
-
A small burst near the window boundary is acceptable.
-
You want easy configuration.
Example:
100 requests per minuteUse Sliding Window when
-
You need smoother traffic.
-
Fairness is important.
-
Boundary bursts should be reduced.
Example:
Public search APIUse Token Bucket when
-
Short bursts are acceptable.
-
Long-term average traffic must be controlled.
-
Clients sometimes perform batch operations.
Example:
An API allows 100 immediate requests and restores
10 tokens every minute.
Use Concurrency when
-
Operations are slow or resource-intensive.
-
You must protect database or CPU capacity.
-
The request count matters less than simultaneous execution.
Example:
Only five reports may be generated simultaneously.Production recommendations
-
Prefer per-user, per-tenant or per-API-key partitioning.
-
Avoid relying only on a shared global limit.
-
Return
429 Too Many Requestsfor rate rejection. -
Add a
Retry-Afterheader when available. -
Keep queues small or disable them.
-
Use Concurrency Limiting for expensive endpoints.
-
Consider combining a time-based limiter with a Concurrency Limiter.
-
Store limits in configuration instead of hard-coding them.
-
Load-test limits before deploying.
-
Monitor rejected requests and queue duration.
-
Configure forwarded headers properly before limiting by IP.
-
For multiple application instances, remember that the built-in limiter normally operates independently inside each server process.
-
Use an API gateway or distributed rate-limiting solution when a single limit must be enforced across multiple servers.
-
Rate limiting helps mitigate abuse, but it does not replace WAF or DDoS protection.
Key points
-
ASP.NET Core provides four built-in rate-limiting algorithms.
-
Fixed Window is simple but can create boundary bursts.
-
Sliding Window produces smoother and fairer traffic control.
-
Token Bucket allows controlled bursts and gradual replenishment.
-
Concurrency Limiter controls simultaneous requests, not requests per minute.
-
AddRateLimiter()registers rate-limiting services. -
UseRateLimiter()enables the middleware. -
[EnableRateLimiting]applies a named policy. -
[DisableRateLimiting]disables endpoint-specific rate limiting. -
Rejected requests normally receive
429 Too Many Requests. -
Partitioning provides separate limits for users, tenants, API keys or IP addresses.
-
Chained policies can combine client-level and server-level protection.
-
Rate limiting supports security but does not replace dedicated DDoS protection.